Hello Blog
friends,
Welcome back! Hope you enjoyed my last offering
and if you haven’t seen it, just scroll down.Today, I’m sharing a Personalised Belated Birthday card and matching gift box.
The card already came folded, all I had to do is create the easel by folding the top of the card back onto itself, and I grabbed another similar card, cut that in half for the top of my easel card, the other half I kept for when I make another easel card next time.
I embossed
the top card with a cupcake embossing folder, using my spellbinders die cut
and embossing machine. Also used different Spellbinders label dies.
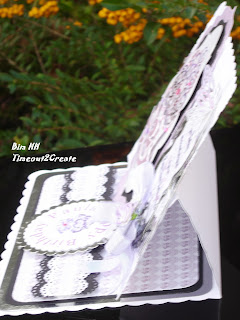
To make a stopper for the easel so it could stand freely, I punched a strip of black card and backing paper on both sides using Martha stewart punch or you could use spellbinders edgers layered them using double sided tape then attach to my card using mountain foams. I used the graphic to type in the name printed it out- Using spellbinders circle die to cut it out, then layered onto scalloped circle die.
This resize before cutting to accommodate the gift and to coordinate with the card. I used extra strong double sided tape to put it together, then decorated as desired!
The next
step was deciding on my focal points…I reached for my craft studio CD-ROM professional called
simply silhouettes, this comprises of different
unique papers and toppers. (Saves lots of storage spaces)
Once I have
chosen my preferred cupcake topper (Love this swirled cupcake...looks yummy!) I actually
shrunk it down and made my own backing paper. (Check here for tutorial)
 |
| The cupcake is stunning, has a lovely swirls on top, ideal for lots of bling |
The packaged gift was kind of lilac, that's where my inspiration began so, I changed
the cupcake and backing paper to suit. The cupcake and backing paper was
printed twice using Kodak colour printer,
Cupcake was cut freehand (twice) so I
could decoupage the ribbon around it.
To put the card together, I cut out a
silver mirri (mirror) card, black card and a piece of the printed backing
paper, rounded the edges to give it an interesting look. Mat and layered them
(This simply means layering stack of paper and or card with the largest one at
the bottom then the next size down and so on) using scotch double sided tape to attach them together.
 |
| Side View Easel card showing the stopper |
 |
| Close up! |
 |
| Here you can see the Personalised Envelope! |
 |
| Now you can see the Card and the Envelope together! Competed with Bling, Flower, butterfly, Ribbon etc, etc The envelope was also embossed with the cupcake embossing folder. |
Gift Box- A Chinese takeaway type
box Called - So Fortunate- MTME
This is an SVG Cut file which I used my trusting Limited edition Pink Cricut Machine for Cancer Care for my cartridges and my Silhouette Cameo Cutting Machine
This is an SVG Cut file which I used my trusting Limited edition Pink Cricut Machine for Cancer Care for my cartridges and my Silhouette Cameo Cutting Machine
or you might want to use Sure Cuts a lot- SCAL to cut out the template.
This resize before cutting to accommodate the gift and to coordinate with the card. I used extra strong double sided tape to put it together, then decorated as desired!
 |
| Here I embossed a strip of lilac centura pearl card using swiss dot embossing folder, punched out a butterfly embellishment using one od Martha Stewart punches! |
 |
| Here another one of Martha Stewart Flower punch, I added a faux gem for a bit of sparkle! |
 |
| I love to relax with a bit of Yankee Candle after a hard shift at work! |
 |
| Yankee Candle with shade and plate, L'Occitane hand cream, as we wash our hands more than100 time a day. |
 |
| Don't you just love how all the gift can be neatly packaged into this lovely packaging! In case you're wondering, I had to resize it so it was big enough to accommodate! |
Project Recipes:-
White Card, Silver Mirri (Mirror) Card, Cupcake embossing folder, Spellbinders die cut and embossing machine, Kodak Printer, My Craft Studio graphics CD or here, Super smooth Printing paper and cards, Spellbinders Nestability Grand labels 4 normal label 4, Labels twenty, Stamps, Lilac Ribbon, Rose bud, glitter, faux gemstone (Bling) Template- MTME, iphone, Camera, Click free for backing up all my photos and data.
White Card, Silver Mirri (Mirror) Card, Cupcake embossing folder, Spellbinders die cut and embossing machine, Kodak Printer, My Craft Studio graphics CD or here, Super smooth Printing paper and cards, Spellbinders Nestability Grand labels 4 normal label 4, Labels twenty, Stamps, Lilac Ribbon, Rose bud, glitter, faux gemstone (Bling) Template- MTME, iphone, Camera, Click free for backing up all my photos and data.
Thanks all for looking, hope you come back tomorrow for another one of my creations!
Hugs,
Bim xx


No comments:
Post a Comment